Turning on the LiteMage Module
The LiteMage module needs to be enabled for each Magento store. Add the code below to the .htaccess file under the root directory of each Magento installation:
 <IfModule Litespeed>
 LiteMage on
 </IfModule>
LSWS 5.1.10 or Later - Setting “LiteMage on” in the code block above will cause the server to attempt to use shared private cache information to speed up page load times for first time visitors. This feature is only supported as of LiteMage 1.3.0 . If you are using an older version of LiteMage or want to disable this feature, change “LiteMage on” to “LiteMage safe”.
Note: If your .htaccess file is ever overwritten you must re-add this code for LiteMage to work.
Of course you will need to verify if .htaccess files have been enabled in the Apache configuration if LiteSpeed is running off of it.
Check your Apache configuration file for the related “Virtual Host” section and make sure the following is set:
<Directory /path/to/your/magento_store_installation>
  AllowOverride All
</Directory>
Note: If set to “AllowOverride None”, .htaccess files will be disabled. Therefore LiteMage will not be enabled even if you place “LiteMage on” in .htaccess.
For cPanel users: The auto-generated main configuration file in /usr/local/apache/conf/httpd.conf may include other files like “/usr/local/apache/conf/userdata/std/2/test123/test123.com/*.conf”. You need to check all included files to ensure that .htaccess is enabled.
Alternatively, the enable code can be placed in the virtual host conf section instead of in .htaccess.
LiteMage Extension for Magento Installation
The LiteMage extension for Magento needs to be installed for each Magento installation. Varnish cache and other full page caches must also be disabled ( including Magento built in full page cache ). Normally locate the xml file for the modules located at app/etc/modules/, For example, Extendware_EWPageCache.xml, and change <active>true</active> to <active>false</active>. Alternatively, you can rename the xml to other name such as adding .disable to it: mv Extendware_EWPageCache.xml Extendware_EWPageCache.xml.disable. You will need to go to system→cache management→ Configuration (refresh the configuration) and flush the cache storage .
Note: Updating LiteMage will overwrite LiteMage's config.xml file; be sure to backup your config.xml file if you have made any customizations before updating LiteMage.
-
Log into the Magento Admin Panel.
-
Navigate to System → Configuration and under “GENERAL” in the left side menu, click “Web”. Under “Session Validation Settings” set Use SID on Frontend to “No”.
-
If you currently have compilation enabled, please disable it by navigating to System → Tools → Compilation and clicking “Disable” at the top right.
-
Navigate to System → Magento Connect → Magento Connect Manager. (You will be prompted to enter the Admin Panel password again)
-
Get the LiteMage Extension from LiteSpeed site:
-
In the Magento Connect Manager, go to “Direct package file upload. Select the downloaded LiteMage package and then click “Upload”.
-
At the top of the Magento Connect Manager, click “Return to Admin”.
-
If you would like to re-enable compilation, you may do so now by navigating back to System → Tools → Compilation and clicking “Run Compilation Process”.
-
Navigate to System → Configuration and in the left side menu under “LITEMAGE CACHE”, click “LiteMage Configuration”. (If it returns a 404 Error, log off and then log back in)
Turn LiteMage On/Off in Magento Configuration
-
Navigate to System > Configuration, and in the left side menu under LITEMAGE CACHE, click LiteMage Configuration.
-
Under General Settings, set Enable LiteMage Cache to Yes.

-
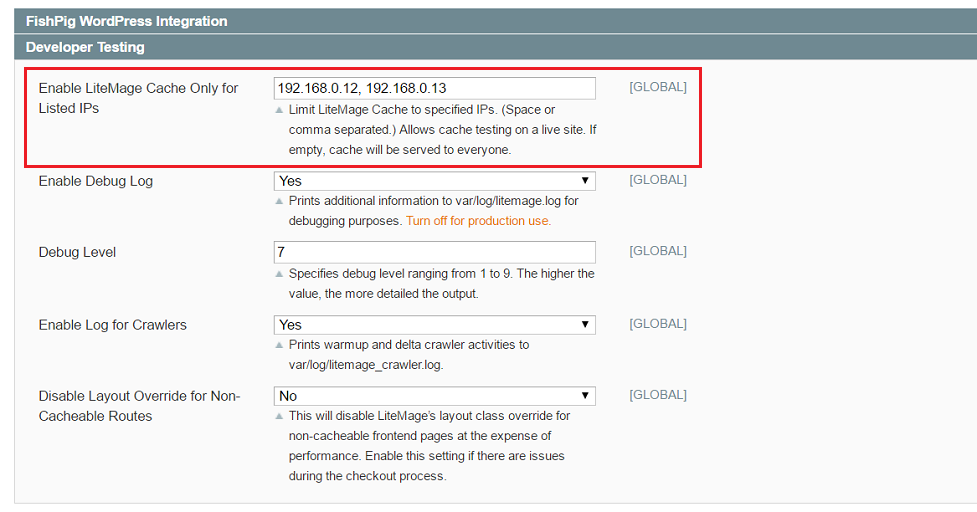
For initial deployment, we recommend running LiteMage in test mode. Under Developer Testing, add your IP address to Enable LiteMage Cache Only for Listed IPs. Remove your IP when done with testing.
-
Click the Save Config button at the top of the screen.
-
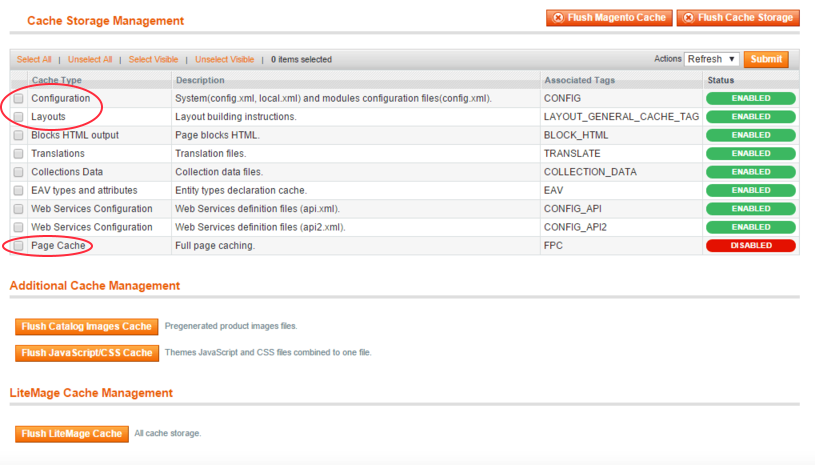
Navigate to System > Cache Management. Under Cache Storage Management, check the box next to Configuration and click the Submit button to refresh the configuration cache.


Notes:
-
To turn off LiteMage, set Enable LiteMage Cache to No and refresh the configuration cache again.
-
If you encounter a Your installation of LiteSpeed Web Server does not have LiteMage enabled. error message, make sure that your LSWS has the LiteMage module and that you have enabled LiteMage in your Magento .htaccess file. (Refer to the Turn on the LiteMage Module step above).
-
Once LiteMage Cache is enabled, a Flush LiteMage Cache button will show up under System > Cache Management. If you click Flush Magento Cache or Flush Cache Storage, it will automatically flush LiteMage Cache as well.
-
For LiteMage to work correctly, you must have both Configuration and Layouts Enabled under System > Cache Management. If you are using Magento Enterprise, you must also Disable Page Cache.
-
LiteSpeed doesn't need anything from Blocks HTML output. Leave it Enabled to start, but if it causes trouble, you can set it to Disabled.